 cooking trails
 No comments
Tryst with Yeast...
I have been baking basic cakes and pastries for sometime now. I am a big fan of http://www.Joyofbaking.com and the end result of the recipes on this website are fabulous. I was scared of trying out yeast based recipes. I have gone through a lot of reading material / youtube videos in the internet, on yeast proofing and kneading/folding of bread dough. When i tried “Blue Bird” active yeast for the first trial, the bread turned out like a rock !! Then a friend of mine bought active yeast (non branded ) from a local baking supply store. Initially i was skeptical but when i started using it, i was super excited with the end result.
My first trial was our daily bread. I used the recipe from http://dinnerwithjulie.com/?s=white+sandwich+bread. This recipe on this website has detailed step-by-step instructions along with photographs.
From my personal experience, a few issues i faced while following the recipe :
- The yeast took 10-15mins to froth (proofing).
- The dough turned out very sticky. so, i kept adding flour and continued kneading until the dough was moist but not sticky anymore. The only ingredient to tweak is the salt to match the additional flour that i added.
- I also added a little olive oil to the dough to make it less sticky just like how we do for roti dough.
- The first and the second rise took almost two hours. Maybe it was because of the fact that i used “active dry yeast” instead of “instant yeast”.
- It is recommended that the bowl (with dough) is kept in a warm place and does not have any draft. I kept mine inside the oven (in the off mode).
- I used the hand blender (dough hook attachment) to mix the dough initially. This way you can save your energy to knead the dough.
- Do not rush with the preparation, set aside an entire 6-8hrs from the time you start organizing the ingredients till the bread is out of the oven. It is worth the wait though.
 |
Inspired by the outcome of the bread, i turned to my next recipe - “Cinnamon rolls”. I followed the recipe from http://www.joyofbaking.com/breakfast/CinnamonRollsBuns.html . The website has a detailed writeup and video of the recipe.
In order to make a smaller batch of Cinnamon rolls, I halved the ingredients and still ended up with 8 rolls. When i look back at the process of baking the cinnamon rolls :
- The recipe calls for directly mixing the yeast with the flour. To make sure that the yeast was active, i proofed it the traditional way (with warm water and sugar). This added more moisture to the dough.
- The dough turned out very sticky and i kept adding flour till the dough was moist but not sticky.
- I used 2 eggs when dividing the quantity of ingredients by half. This probably again added more moisture to the dough.
- Since more flour was added than recommended, i tweaked the quantity of salt .
- In the recipe, i replaced the cream, with milk.

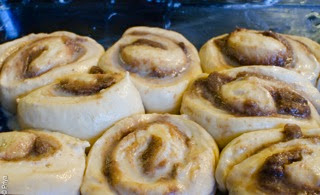
- As per the instruction, for the second rise i had kept the rolls packed together in a baking dish. I noticed that after the second raise, the rolls were all squished together and probably needed more space. The next time, i will try laying out on a baking tray and space out the individual rolls.
- For the second rise, the rolls were refrigerated overnight. For the rolls to thaw, the next day morning i removed it an hour before baking.
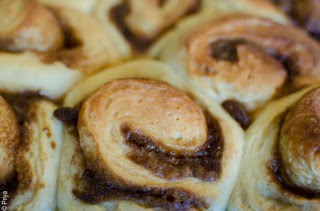
- The texture of the rolls were great, when served fresh from the oven. Once refrigerated, the baked rolls did become a little dense . Thaw it half hour before eating and then warm it up in a microwave, an oven or a tawa.

Happy Baking :-)
